
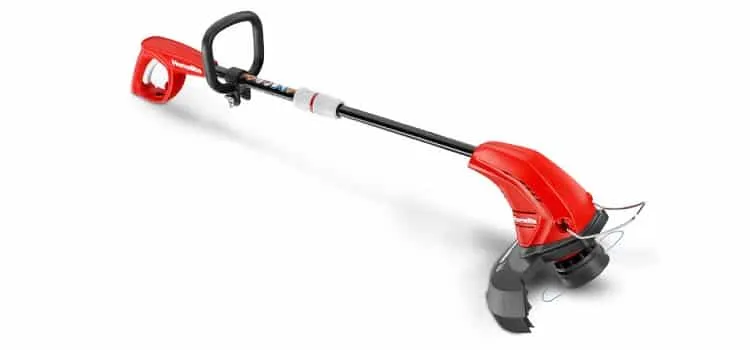
Adjusting the carburetor on a weed eater is pretty simple and you can do it on your own. Any gasoline engine be it a weed eater or a chainsaw has a carburetor. The carburetor loosens up ( in rare cases tightens) with the time. When the carb deviates from its respective position, your string trimmer engine doesn’t get an appropriate fuel supply.
So, you need to adjust the carburetor on your weed eater. Thus, your engine will produce an optimum performance as it did previously. In this article, we will discuss the adjusting procedure and the process will be an easygoing step by step.
Before you start adjusting the carb, it would be great if you gain some basics of a weedeater carburetor. Keeping that in mind, we have given some basic insights on the weedeater carb below. You may skip the basics if you already have and start adjusting the carb directly.
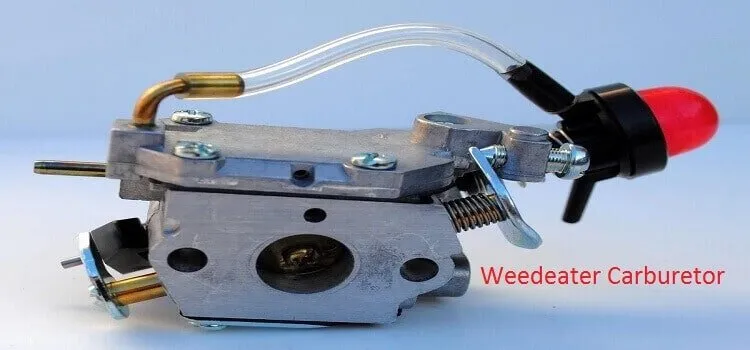
Basics of The Weed Eater Carburetor
The carburetor of a weed eater is for mixing the air and fuel and supplying that to the engine. This is a huge job for the weed eater engine. If the carb fails to do its part, your weed eater will start starving and eventually shutting down. The weed eater has an air filter that filters the air to remove dust and dirt. The carburetor takes the air from this air filter. At the same time, the carb takes the fuel from the fuel tank.
Now, when you press the engine throttle, the carburetor supplies the fuel into the combustion chamber. The amount of fuel supply depends on your throttle position. The more you accelerate the throttle, the more air and fuel mixture sent to the combustion chamber. The carburetor has to do this complex task as long as your engine remains On.
Over time, the position/placement of the carburetor deviates. As a result, it becomes unable to play its assigned role. Thus, the weed eater engine starts facing a scarcity of fuel. So, we need to adjust the carburetor to get better performance.
Necessary Tools for The Weedeater Carburetor Adjustment
- A Clean Workspace
- A weedeater with sufficient gasoline
- Screwdriver (Phillips-head)
Steps of Adjusting The Carburetor on a Weed Eater
Just follow these 6-steps of carb adjusting. Do not try to improvise anything during your carb adjustment. That may result in a defective and unserviceable carb.
Step 1- Locating the Carb
At first, identify the carb of your weed eater. Generally, the position of the carb of most of the weed eaters is between the air filter and the fuel bulb. Now, locate the screws that adjust the fuel supply. There are two screws on the carb. One is labeled as “Hi” and the other one as “Lo”. These screws maintain the engine at high throttle and idle respectively.
Step 2- Tightening the Screws
Now, with the help of the Phillips screwdriver tighten these screws. The position of these screws should be towards the “jets” of the carb. There is a needle end for the screw to make the correct alignment.
Step 3- Adjusting the Screws
Now, it is time to adjust the screws. At first, turn the “Hi” labeled screw 1 1/2 times counterclockwise. After that, turn the “Lo” labeled screw 1 time counterclockwise.
Step 4- Starting the Weed Eater
Pull out the choke to start the engine. The engine will produce a rough/wired sound. Don’t worry, that’s happening as the screws have been tightened. You have to keep the engine running. If required, keep one hand on the engine throttle to keep the engine running. It is mandatory to warm up the engine for accurate adjustment.
Step 5- Adjusting the Carb
Now, we are at the final phase of adjustment. Start the carb adjusting with the “Lo” screw. Turn the screw counter-clockwise and observe whether the engine running smoothly or roughly. Sometimes, the engine may die out or stall. So, make sure that the engine is running smoothly. If it runs fast, the head of the weed eater may come out!!
Now, push the throttle of the engine to set it to the full position. At this stage, the weed eater engine should sputter. Now, turn the “Hi” screw clockwise until the engine runs smoothly and produces a natural sound. An estimated 1 (1/4) turning of the “Hi” screw should do the job. But, it may vary depending on the size, brand, and capacity of your weed eater.
Step-6 FTR (Functional Test Run)
Well, you are done with the carburetor adjustment. Keep your weed eater running for a few minutes. This is called observational/ Functional run. Keep the Phillips in your hand/pocket for minor adjustment during the FTR.
Conclusion
There is a well-known proverb, “The headache happens if you have a head”. In the same way, every machine creates some troubles from time to time. But, we need to troubleshoot them to keep them in good working condition. You need to take care of your weed eater and do some fine tunings to get the optimum output. If you know some small scale repairings like how to adjust a carburetor on a weed eater, things become easier. Thus, you can save your valuable time and money. If you have any queries regarding your string trimmer, feel free to let us know. Use the comment box below to drop a line.

Cant get to the screws? How come u can?
Hi Fred,
Generally those screws (Hi, Lo) locate at the side of the carb. So, you need to look for either side of the carb as the placement varies brands to brands. Happy fixing ☺
my weed eater takes a special tool to adjust the carb. not a Philips head.