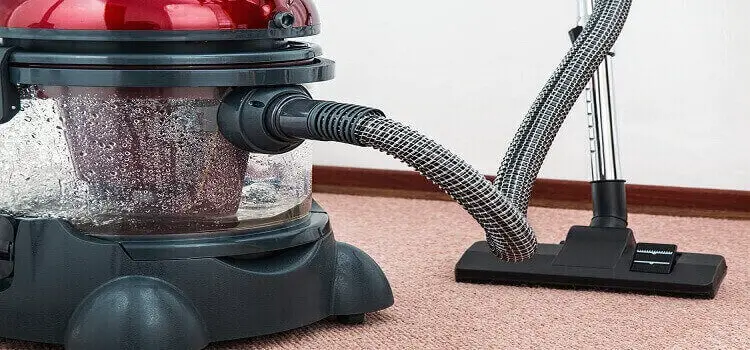
A vacuum cleaner is a very common and handy tool for cleaning conveniently and comfortably. Sometimes, the vacuum suffers from troubles with its suction power. In this article, we will discuss how to fix a vacuum cleaner with no suction or little suction.
It is no denying that a vacuum can handle a lot of hard work. Different people use it for their home and professional purposes. It is more than a tool if you want to keep your home clean and smart. A Professional or homeowner often uses shop vacs for woodworking.
No matter for what purposes you use your vacuum cleaner, you need to keep it serviceable. Anyways, without further ado, let’s dive into the troubleshooting process.

Why A Vacuum Cleaner Results in No Suction?
Several reasons may cause your cleaner to have little to no suction. Some common reasons are:
- The improper power setting of the vacuum.
- The dust container/bag is too full.
- The filters of the vacuum are clogged or damaged.
- The hosepipe is cracked or clogged.
- Blockage in the intake port of the vacuum.
- The broken vacuum belt.
- Problems with the rollers or brushes.
- Air leakage from one or more parts.
Below, we will discuss all of these probable reasons along with their solutions. To keep the troubleshooting process simple, we will discuss it step by step. Follow these steps to identify and rectify your problem.
Steps to Fix a Vacuum Cleaner with No Suction
Step#1 – Check Settings of Your Vacuum
The very first step to fix your cleaner is to check the power setting. Improper power setting may end up offering little to no suction. The power setting of your vacuum cleaner depends on the job level and type of the floor.
Harder jobs require more power whereas light jobs require less power. Your cleaner has to match with the job type. For example, light jobs like cleaning the bare floor require the lowest power whereas, the hard jobs like carpets cleaning needs the highest power.
Almost every modern vacuum has a dial/switch for the power setting. This dial/switch regulates the power of the vacuum cleaner. You just need to adjust the power depending on your job levels.
Step#2 – Check the Dust Container/Bag
Your vacuum will lose its suction power if its container/bag becomes too full. The vacuum collects the dust and gathers it into its canister/bag. When the bag becomes too full, the cleaner doesn’t get the space to gather the dust. As a result, the vacuum cleaner stops collecting the dust and you get the symptoms.
What to do now? Well, you have to remove the dust bag from its bay. Once completely removed, the bag should be emptied and cleaned properly. Now, before reattaching the bag to its bay, check the bag for any tears or cracks. Furthermore, inspect the joining that connects the dust bag with the vacuum cleaner to find out any blockage.
If everything is fine then reattach the dust container with its bay. Give a functional test to see whether the suction power has improved or not.
In 90% of the cases, emptying the dust bag solves the problem. If you are still struggling with the problem, head on to the next step.
Step#3 – Check Filters of the Vacuum
A vacuum cleaner may have one or more filters. It varies depending on the brands and power of the vacuum. However, you need to check the filter of your cleaner to identify whether it is in working condition.
The primary job of the filter is filtering. So, it is very common that it may get blockage due to its job nature. You have to remove the filter from its bay and have a thorough check.
The modern filters are washable and can be used several times by washing. You need to clean/wash the filter to remove any clogging by dust or anything. Once you finished cleaning the filter, place it into its bay. Give another functional test run of the vacuum.
If your problem still persists, move on to the next step, please.
Step#4 – Check the Hosepipe
The hose of a vacuum cleaner plays an important role. Any leakage/tear of the hose may end up losing the suction power. So, you have to give a thorough inspection of the hose.
If you find any crack/leakage on the hose, it is better to replace the hose with a new one. But in case you don’t have that much time, you may fix the hose on your own.
Remember, the hose bears the air suction/blowing. So, it is wiser to use a serviceable or new hose. Anyway, to fix the hose, get electrical or old-fashioned duct tape to cover the cracks/holes.
Once you finished it, give another test run to check the suction power. Not satisfied? Move on to the next step, please.
Step#5 – Blockage in the Intake Port
At the base of your vacuum cleaner (near the beater bar), you will find an intake port. Sometimes, this intake port becomes clogged. You need to inspect the intake port to make sure it is not blocked.
If the port becomes blocked, use needle-nose pliers to reach the clog. Remove the clog and check the functionality of the vacuum.
Step#6 – Check the Vacuum Belt
A damaged, clogged, or jammed vacuum belt may cause your vacuum to lose suction power. In most of the cases, unwanted debris and dust cause the jamming of the belt. So, you need to inspect the vacuum belt to check its serviceability. If it is clogged, you need to clean it.
Furthermore, inspect the belt to find out any cracks or weak points that might be the reason for the problem. A cracked belt should immediately be replaced with a new one.
Step#7 – Problems with the Rollers or Brushes
There are rollers and rotating brushes underneath your vacuum cleaner. Sometimes, they get clogged due to sediment or debris. Check the rollers/brushes to ensure that they are devoid of debris. Any clogging of the rollers or brushes might cause your vacuum to lose its suction power.
Step#7 – Problems with the Air Leakage
To offer your desired suction power, every vacuum has several airtight components. As the vacuum cleaner deals with the suction of air, you need to ensure that those parts are not leaking air.
Checking to find air leakage is the final step of fixing the vacuum. First of all, check the hose that collects dust from surfaces. This hose should be reliably attached and airtight with the vacuum. If you find any loosely connected portion, secure that tightly.
Second of all, check the connection of the dust container. The dust container should be perfectly connected with the vacuum. No, air leakage in this connection is acceptable. If you think the dust canister should be more airtight, do it without any hesitation.
Conclusion
We use tools and equipment to save time and labor. But, if the tools like a vacuum cleaner itself give pain instead of comfort, we get hellish feelings. Moreover, a machine in bad working conditions can harm our mental serenity. So, we need to take care of our tools so that in return they can take care of us. To avoid any sort of unwanted trouble, we should stick to buy the best vacuum available on the market. We hope that our coverage on “how to fix a vacuum cleaner with no suction” was helpful for you. Have a good day!
Read More: How to Fix a Vaccum that won’t Turn On


